How to Photograph Mehndi Designs: 12 Tips for Beautiful Henna Photos
By the Share2Earn team · · Updated · 4 min read
Mehndi (henna) designs are full of tiny details: paisleys, flowers, nets and fine lines that took hours to draw. Phone photos often lose them in shadow, glare or a yellow colour cast. With the right timing, light and pose, your photos can show every line. Here are 12 tips for photographing mehndi on hands and feet, for a festival, a wedding or just for fun.
In this article
Choose the right moment
- Photograph the paste for texture. Fresh, raised paste has a beautiful 3D look, especially in side light. Take a few photos soon after the design is finished, before it dries and cracks.
- Photograph the stain for colour. After the paste comes off, the colour usually starts orange and darkens over the next day or two. The deepest colour is the best time for the main photo.
- Moisturise lightly, but not just before the photo. A little oil or balm helps the colour, but shiny skin reflects light and hides fine lines. Wipe away any extra shine before you shoot.
Light and background
- Use soft daylight from a window. Sit beside a window, not in direct sun. Soft side light shows the detail without harsh shadows between the fingers.
- Turn off yellow bulbs. Mixing yellow room lights with daylight gives skin and henna an orange cast. Switch them off and use the window only.
- Pick a plain background. A plain bedsheet, a dupatta, a wooden table or a wall in a single colour makes the design stand out. Busy patterns behind the hands compete with the mehndi.
- Avoid the flash. It creates glare on skin and flattens the design.
Hand and foot poses that work
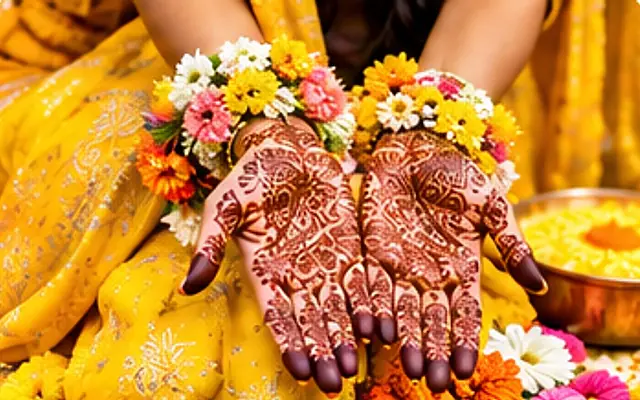
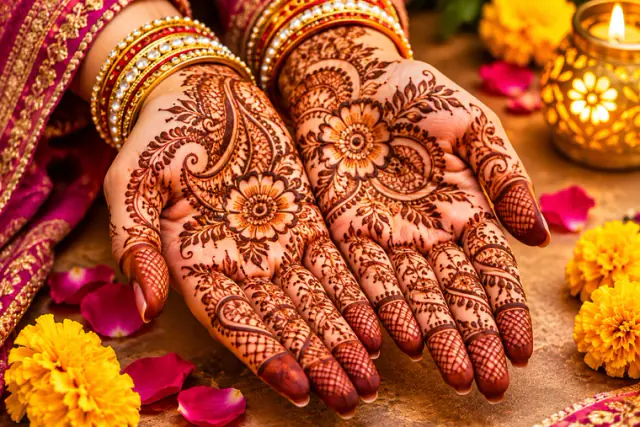
- Both palms open, side by side, fingers relaxed and slightly apart. This shows the full design, especially for bridal mehndi that continues from one hand to the other.
- Backs of the hands for designs on the fingers and wrists. Rest them lightly on a cushion or table to keep them still.
- Add natural props: bangles, a ring, marigold petals or a diya held in cupped hands. Keep props few so the mehndi stays the star.
- For feet, photograph from slightly above with the feet together on a clean surface, or from the side to show the anklets and the design on the toes.
Sharp details
- Tap to focus on the most detailed area, like the centre motif of the palm, and hold the phone steady, or rest your elbows on a table. Use the 2x lens or move closer for details, and check the photo is sharp by zooming in after you take it.
Tip: Ask someone else to take the photo, so the person with the mehndi can pose with both hands. If you are alone, prop the phone on books and use the 3-second timer.
Edit lightly
Crop to the hands, straighten, lift brightness slightly and add a little contrast to make the lines crisp. If the light made the photo too yellow, cool it down slightly so skin looks natural. Skip beauty filters and skin smoothing: they blur the fine lines of the design. Our guide to phone photo editing shows each step.
Entering the Mehndi & Henna contest
Share2Earn's free Mehndi & Henna photo contest runs through November 2026. Enter a photo of mehndi or henna designs on an adult's hands or feet: for Diwali, Karva Chauth, a wedding, Eid or just for fun. The photo must be taken by you during November 2026, and you can enter one photo per topic.
- Only light edits are allowed: crop, rotate, brightness, contrast and colour. No AI-generated or AI-edited images, collages, borders, watermarks or text.
- The person whose hands are shown must be an adult and happy for the photo to be entered. Faces are not needed, and children's faces must not be recognisable.
- Credit the mehndi artist in your share message if it was not you: artists love the recognition and often share it with their followers.
The photo with the highest engagement score wins. Read how to share your entry for honest ways to get more likes and comments.
Shooting mehndi at a wedding? From 1 to 25 December 2026 the Haldi & Mehndi contest takes photos from the haldi, mehndi and sangeet days. See our haldi ceremony photo ideas too.
Questions
When is the best time to photograph mehndi?
For colour, photograph the stain when it has darkened fully, usually a day or two after the paste is removed. For texture, take photos of the raised paste soon after it is applied, before it dries and cracks.
How do I make mehndi look dark in photos?
Use soft window light, turn off yellow bulbs, choose a plain background and add a little contrast when you edit. Avoid strong saturation and beauty filters, which blur the lines.
What background is best for mehndi photos?
A plain, single-colour background such as a bedsheet, dupatta, wooden table or wall. Light backgrounds make dark henna stand out; rich red or gold fabric gives a festive look.
Can I enter a photo of someone else's mehndi?
Yes, if you took the photo yourself in November 2026 and the person is an adult who is happy for it to be entered. You do not need to show their face.
Enter the Mehndi & Henna photo contest
Free for everyone 18+, worldwide. Entries open 7 November and close 25 November. Real photos taken by you this month only.
See the contest →